Introduction
Postman is a tool used by both client/server applications testers and developers to interact with API. Having appeared as a tool for sending simple requests, Postman has now drastically increased functionality, being able to deal with much wider range of tasks. However many of its features are “hidden” due to historical reasons and product positioning. This article is here to shed light on one of those features, namely requests testing.
Postman Installation
Postman is available as a native application for Windows, Linux and MacOS operating systems. Check out the link to download your version (https://www.getpostman.com/apps).
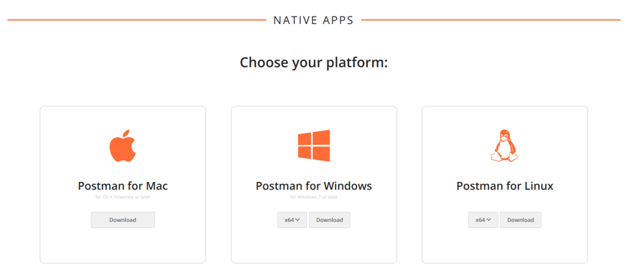
If you are a Windows or MacOS user, just run the installer and follow the instructions. The Linux version comes as a tar.gz file, so you need to:
- Unzip the file.
- Create a desktop file (optional). This will let you run Postman by double-clicking the icon and identify the app in different application launchers including system ones. Create a file by name Postman.desktop in ~/.local/share/applications with the following content:
[Desktop Entry]

Encoding=UTF-8

Name=Postman

Exec=YOUR_INSTALL_DIR/Postman/app/Postman %U

Icon=YOUR_INSTALL_DIR/Postman/app/resources/app/assets/icon.png

Terminal=false

Type=Application

Categories=Development;

YOUR_INSTALL_DIR is the path to the folder where Postman executable is stored.
Running Postman
Now you can find Postman in application launchers. Once you have Postman running, you can sign up on https://www.getpostman.com/ and sign in the app or ignore this step. Note that authorization allows to synchronize your data that might be helpful while working in a team.
In Linux-based systems there are a few issues you should pay attention to:
- Don’t run the app as root This might cause some problems in further using of application (especially for unprivileged users).
- Make sure the running user has read/write permission for ~/.config folder. This is where Postman stores the data.
- Ubuntu 18 users will need a libgconf-2-4 package. It was removed from default Ubuntu packages, but may easily be installed by the command
sudo apt-get install libgconf-2-4Interface Overview
Let’s take a look at the request interface. We’ll need it for writing the test in the future. The main purpose of Postman, as mentioned above, is to perform HTTP-requests. That is why the request interface is the first thing we see after running the app.
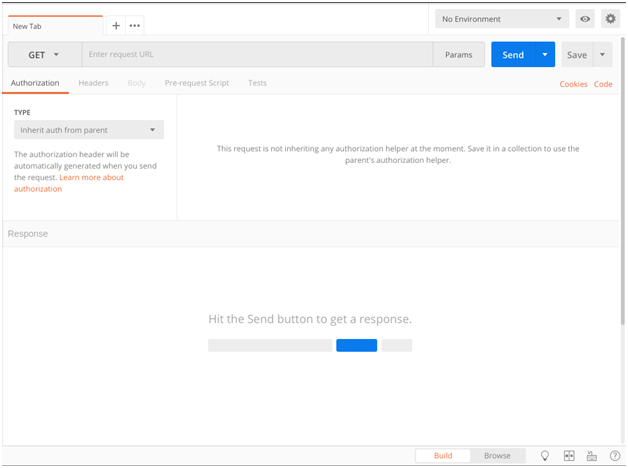
The top bar contains URL and request method (GET, POST, PUT, PATCH, etc.). Click the Params button to set the request parameters.
You can see several tabs just below. Let’s take a closer look at them.
Authorization. This allows to configure authorization methods for the request. Postman has an impressive list of the most common authorization methods. We are not going to change this parameter, thus we won’t focus on it and just move on.
Headers. As the name implies, this tab allows to change the request headers list. A very useful feature is the autocomplete menu both with header names and values list. However the list of autocompleted header values is limited to the content types list only. In fact the value set doesn’t depend on the header name, that may eventually lead to errors.
For headers editing you can use either spreadsheet-style edit mode (Key-Value Edit) or text edit mode (Bulk Edit). Unfortunately, there is no autocomplete feature here, but if you have a headers list in a special format (for instance, task description from bug tracker), this mode comes in handy.

Body: This tab is available for some methods (GET in particular) and allows you to add the request body. The request body interface is quite similar to the request header editing interface but still has its own features.
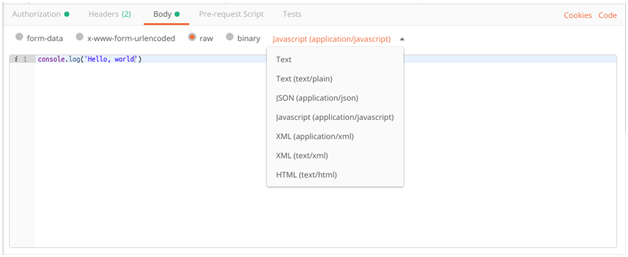
- You can set the required content type choosing from form-data, x-www-form-urlencode, raw, and binary types. Those types, except for interface part, influence on Content-Type header.
- Every type has a description field. That is quite convenient, you can make something like API description.
- The field value can be either text or file.
If you choose the raw request body type, you can edit the request body in a raw form – the very body that is going to be sent to the server. This is not so useful, but having set the appropriate Content-Type header, we can edit the body with syntax highlighting (xml, javascript, json or html).
Request Sending
Let’s send our first request. For the experiment I’m using one of numerous free APIs – https://github.com/HackerNews/API. Here you can find an example of a GET request https://hacker-news.firebaseio.com/v0/item/8863.json?print=pretty.

That’s a typical GET request with parameters. Now let’s dig into response parameters tabs, that are at the bottom of the screen.
The Body tab contains the response body. As you might have noticed, highlighting can be changed here. But in most cases you won’t have to do that – it is set depending on the Content-Type response. You can also view the response body with no highlighting in Preview mode. This mode is helpful while viewing rendered content of an HTML response.
And the last thing we haven’t discussed on this tab is the line break button. As you can guess, it enables breaking long lines.
Cookies tab is unavailable here since this request doesn’t contain any cookies. We’ll get into Cookies tab features next time.
Headers tab is quite reserved. No mode changing, no highlighting. Just a key-value list.

We have dived in the basic Postman features to deal with HTTP requests, which can help us in testing. At the same time we’ve left behind some exciting ones as variables, environment, collections, etc. It has already been said that Postman has become something more than a simple tool for sending requests. And that’s not only about tests, if you just have a look at that New drop-down menu.
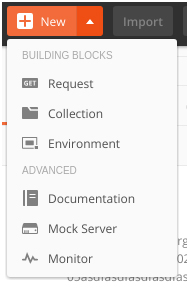
This truly is an impressive list.
Writing tests
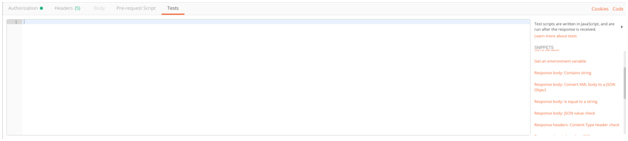
Finally, we are here to create our first test. You can find the test editor under the Test tab of the request builder. Simple as that – there is an edit box on the left and snippets list on the right. Snippets allow to create test templates and help inexperienced testers in their work, but software development skills are highly important with Postman as all tests are written in JavaScript.
In our case, we need the snippet ‘Response body is equal to a string’. Choose that and Postman will generate a test template.
pm.test("Your test name", function () {

  var jsonData = pm.response.json();

  pm.expect(jsonData.value).to.eql(100);

});
var jsonData = pm.response.json();Convert the response from JSON to JavaScript object:
pm.expect(jsonData.value).to.eql(100);Check if the value received from the object is equal to 100. That’s pretty much it, we only need to add our data to the test. Change the last line to:
pm.expect(jsonData.id).to.eql(8863);Here we check if the id of the received object is the same as requested id (8863). Now you see, there’s no problem with writing a test having all those snippets ready to help.
Resend the request to run the test. Now we can see the results of our test on the Response panel under the Test tab.
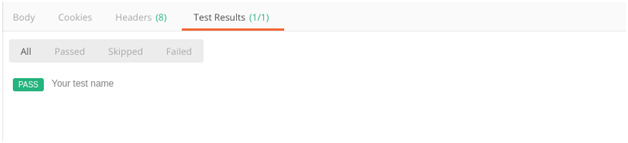
Congratulations, the test “Your test name” was successfully run!
And what if it wasn’t? Let’s change the id to irrelevant one:
pm.expect(jsonData.id).to.eql('wrong id');After sending the request Postman says that your test failed:

Conclusion
In this article we’ve discussed basic features, that help in writing tests. Unfortunately, JavaScript skills are essential for working with Postman. To this end, Postman loses the game to SoapUI. However, snippets make things easier. Besides, the language is quite easy to learn (as compared to built-in Groovy in SoapUI). Anyway, automation tests is a new step in testing, and using this approach you can significantly increase the quality of your product.