
In the last article we described a few TestMace features using a simple case, and today we’ll continue reviewing our app.
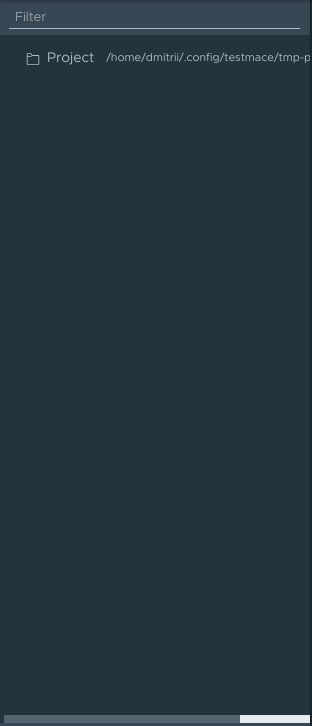
The Project
We have already given the definition of the project. Basically, it is no different from one of any typical IDE, graphics editor and other apps. A TestMace project is stored in the file system, and due to a human-readable format it allows to monitor changes using the version control system.
The project tree is located on the top of the sidebar, and a temporary project is created in $AppData/tmp-project directory during the first run and after creating a new project ($AppData depends on your OS). The project can be saved in any other directory, if necessary (use the File menu actions). In our example the project tree looks like this:
Note that at the moment all nodes are runnable. It means that:
- When running the RequestStep node, the pre-configured request is sent.
- When running the Folder and Project nodes, all nested nodes are run successively.
- When running the Assertion node, this node’s assertions are executed.
To understand our project better, let’s see the example. We’ll use this project, that is deployed at https://testmace-stage.herokuapp.com. This open source project is a very convenient solution for client testing.
Here we are interested in the posts resource of the project. It fully supports CRUD, so let’s imagine we need to create the following scenario:
- Make a post with a certain title. Get the post with an id in response.
- Check if the post with the given title was made.
Let’s go. As we mentioned earlier, a Folder node is a great choice for grouping nodes. What is interesting about this Folder type, is that the nodes within it are run sequentially that allows to group them into scenarios.
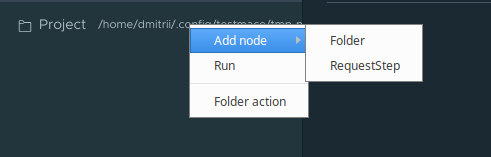
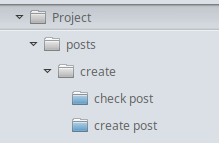
Now add a folder “posts” to the project and then add a subfolder “create”. You can do it via the context menu of the chosen parent:
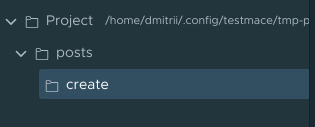
In our case, the project tree will be like this:
According to our scenario, we need to send a request for making the post first. This request is going to have the following parameters:
- URL https://testmace-stage.herokuapp.com/posts
- POST Method
- A Content-Type header with application/json value
- The body {“title”: “My first TestMace post”}
Well, let’s create a RequestStep node with these parameters. See what I’ve got:
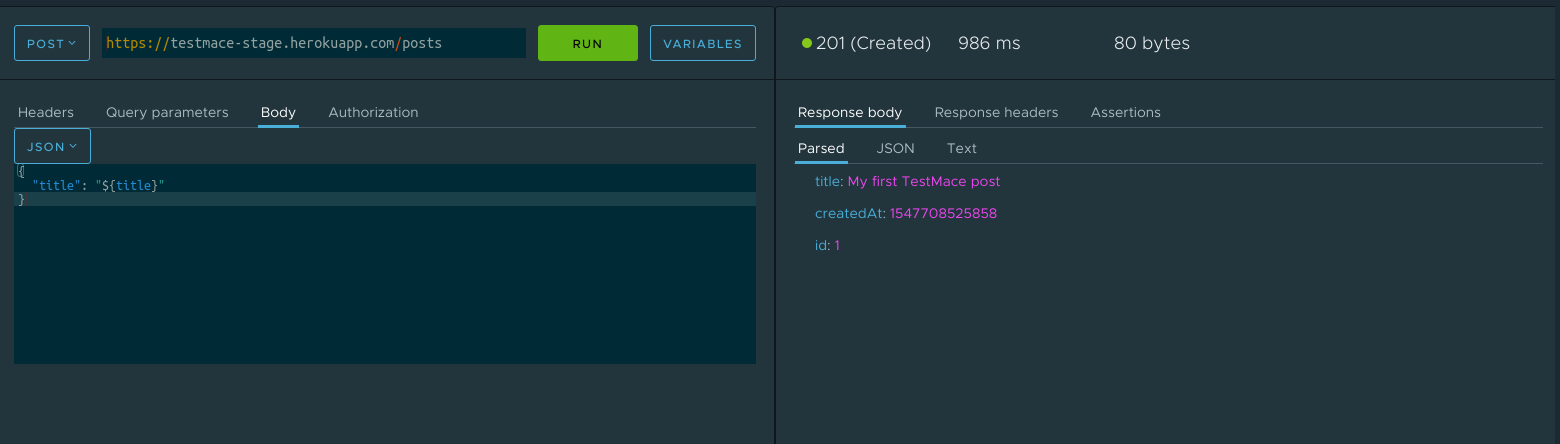
As you can see, the server says the post was created, but I want to check it to be sure.
Obviously, to do that we need to fetch this post by its id. So we are to make the following request:
- URL https://testmace-stage.herokuapp.com/posts/${id}
- GET method
But how do we get the id? We can do it using the default variable $prevStep and going back to the previous step. The full path to our id will be $prevStep.$response.body.id. So this is how our result request look like:

As you see, the id was passed correctly. Now all we need is to add an Assertion node to check the scenarios automatically. In the previous article we showed you a quick way to create an Assertion node from a parsed response. Here’s a gif for it:

Nice! We have created a scenario and a test. Now we just run the create folder (or any other parent, including the Project node) and we can run the scenario.
We have just one step left to make our project perfect. The thing is that “My first TestMace post” title can be seen in at least two places – in the first request and in the Assertion node. Copy and paste is never a good job, since if you want to change the post title, you are going to have to do that several times, and there is a chance that you can forget to change something.
This problem can be solved with the help of variables mechanism. Let’s define the title variable and use it in our nodes. We’d better do it in the create folder, as we’ll be able to use our variable in any child node, thanks to variable inheritance mechanism. As you homework, try to create and use this variable 🙂
One more thing to say here is that using this test, you can be confused to find a useless entry after its run. To avoid this side effect and test another functional part of your application you can
add one more RequestStep to your scenario that would send a request to delete a just created entry and additionally create a test that would check if the entry was deleted.
Project Storage
One of the benefits of TestMace is a human-readable format for storing your projects. Each node is stored in a separate folder or file. We use the YAML format for storing files.
Now I’ll show you how TestMace works with project files. In our project’s file system the directory hierarchy is the following:
As you see, the directory hierarchy is almost the same as the nodes hierarchy. Let’s look at how the Project node is stored. As we know, this is the root node of the project. In the file system it is stored in the index.yml in the Project folder. It looks like this:
type: Project

name: Project

environments:

  active: null

  environments: {}

children:

 - posts

variables: {}

authData:

  type: inherit

settings:

  proxy:

    enable: false

version: '1'
- type has the node type (Project, Folder, RequestStep или Assertion). All node type files have this field.
- name has the node name.
- children has an array of children and also defines their order.
Other fields will be described after we state the main features, but their names speak for themselves.
Now we go on. The project node contains the posts node with the index.yml file in it, which format is pretty similar to one of the Project node.
See the create node as an example of variables storage. If you were successful in passing the “My first TestMace post” title to a create node’s variable, then you’ll see it in the file system:
children:

  - create post

  - check post

variables:

  title: My first TestMace post

cookies: []

type: Folder

authData:

  type: inherit

name: create
Nothing special, just an ordinary key-value storage.
The RequestStep node has pretty much the same story with its storing – the node folder contains an index.yml file. This is how the file of the make-a-post request looks like:
children: []

variables: {}

type: RequestStep

requestData:

  request:

    method: POST

    url: 'https://testmace-stage.herokuapp.com/posts'

  headers: []

  params: []

  body:

    type: Json

    jsonBody: |-

      {

        "title": "${title}"

      }

    xmlBody: ''

    textBody: ''

    formData: []

    formURLEncoded: []

authData:

  type: inherit

name: create post
No comments here, it seems obvious.
And the last node here to talk about is the Assertion node. It is stored as an yaml file in the parent RequestStep folder and has a corresponding to the project assertion node name. We have only one Assertion node in the project and it looks like that:
children: []

variables: {}

type: Assertion

assertions:

  - disabled: false

    type: compare

    actualValue: '${$response.body.title}'

    operator: equal

    expectedValue: '${title}'

name: Assertions
Here we are interested in the assertions array. Each entry format in assertions is different and depends on the assertion type. However, disabled and type fields are shared. That’s it, there’s no need to describe other obvious things.
Conclusion
We did a great job today! We created a very common scenario and tested it. Note that you didn’t have to write any code here, but if you used another app you would have! This is what our purpose is. We want to create a powerful but at the same time simple tool for API testing. And I think, we’re halfway there, aren’t we? 😉