Prerequisites
- You should have a nodding acquaintance with the HTTP comprehending what the request and response consist of.
- You should understand the principles of a query construction for a service resources access and what REST API means.
Introduction
SoapUI is a tool for Web Services testing that based on work with HTTP. There can be services which API is built upon the REST methodology or the SOAP protocol. Developers and QA engineers use this tool for automated functional, load, regression tests and many other things. SoapUI is considered the richest software tool of a kind in terms of functionality. Launching this program for the first time you don’t know where to look first as you don’t understand where to start. However, the range of its opportunities and its utility are being realized when you dive back into it and work for a while.
In this article I would like to assist newcomers to take the first step towards getting acquainted with this powerful tool from scratch, from its installation to creating your first HTTP request to a REST service and to its coverage by tests. Here we go!
Installation
SoapUI is a cross-platform program that is available in two formats: Open Source и Pro. To complete everything that will be covered in this article the Open Source version functionality is enough.You can download an installation file for Windows, Linux, MacOS on the developer official website https://www.soapui.org/downloads/latest-release.html.
There are some key steps for the installation on the 64-bit version of Linux:
- firstly it’s necessary to install JRE
- download an archive with the program
- extract the installation file into a catalogue
- make sure that a user on behalf of which a launch is performed has the rights to read and write to the directory
- enter the catalogue, grant rights to run a file bin/soapui.sh
- The next step is an optional one. Create a run app shortcut following the steps listed in a guide from another article “Your First Postman Test”.
As for other software systems it’s quite easy. Suffice to download the installation program, run it and follow its simple instructions. If any issues have been noticed during the installation process you can refer to the detailed manual and a relevant section of documentation to find a solution.
Interface overview
Launch the program. There you can see the following interface components:
- a project console (on top). There are buttons for a project creation, import of a previously created project, save, a link to a community forum, SoapUI app settings, and quick switching off/on of a run queries through a proxy server.
- a project navigator (on the left). A project tree is displayed here you can add, delete, disable nodes of different purposes (Project, API server scheme, test cases, and etc.).
- a properties window of the chosen node (bottom left). Depending on the node selected in the navigator, tables with various sets of properties for their quick editing are displayed in the window.
- a primary workspace is located to the right of the navigator, there editing and running all the project tree elements happen.
Creating a project and an API scheme
By default the navigator has a Workspace node, in which nodes of a Project type are grouped. You can create a project draft through the app menu File > Create empty project by clicking a relevant button in the project console or through a context menu of the Workspace node in the navigator.
To create any RESTful service query in SoapUI you first have to create a WADL(Web Application Description Language) element in the project, in which resources and accessor methods to them through the web service interface are described. There is an opportunity in SoapUI to import an API scheme from Swagger, open an already prepared scheme or create a new one from scratch. So let’s create a scheme from scratch.
I use one of the many free API’s as a guinea pig. Let’s create a GET request at URI as an example https://hacker-news.firebaseio.com/v0/item/8863.json?print=pretty. You need to choose New REST Service from URI through the context menu of the created project in the navigator. Enter our URI in the dialog box. Four nested nodes are created in the tree. We’ll sort it out what is what.

The top level element is the entire WADL scheme. If you open this node by a double click you can see the navigator window and description of the scheme in the WADL language (derived from XML) in the appeared window on the WADL Content tab. In the settings of this nodes on the Service Endpoints tab you can list various hosts names on which running this service. There is already one host name that the program has derived from the input URI. Let’s imagine that we are developers of the service and want to test a new functionality on the test server (for example, a fictitious server is https://stage.hacker-news.firebaseio.com) and keep an eye on our realised server. In this case you need to add one more record into the endpoints https://stage.hacker-news.firebaseio.com. Now we have the opportunity to choose on which server we will run the prepared test cases.
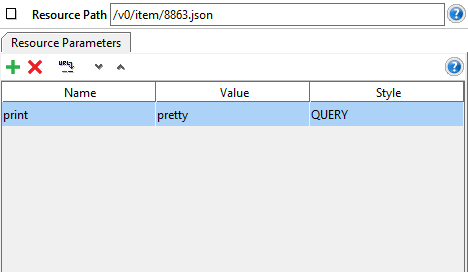
The next element named 8863.json [/v0/item/8863.json] has the form of one of many service resources description. In this case a type of resource is an item, and 8863 is an identification number of a concrete instance of this type. You can specify a path to the resource on the server in the edit window for this element and add a number of parameters and headings with which any requests to this resource should be made.
On this step, I would like to add a bit of Feng Shui in the scheme description and make this resource more universal. In the program generated path to the resource, requests can only be made to the instance with the ID 8863 in json format. Let’s assume that there are more instances on the server than this one and they can be implemented in XML format. To make description of the resource more useful you should rewrite the path to it having applied template parameters:
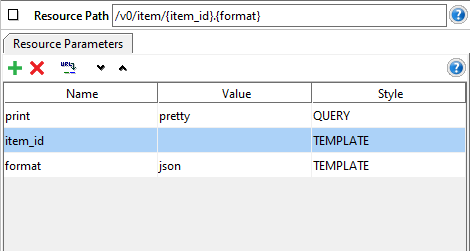
You can create queries to this resource in a such way transferring instance ID item_id and its format format ( json by default) as a parameters.
The following element defines available query methods to the resource. In the edit window for the element you can choose method type and add various query parameters specific to requests when accessing a resource through this method. You can add many queries to a such node on the navigator tree. Each of them is able to extend a number of parameters and assign a specific value. The program has generated GET method from the previously input URI. This is exactly what we need.
Well, finally, we give consideration to an element of the request itself. In this component you can directly run a query to a service on one of the endpoints, defined in WADL, for an access to the resource through the chosen method. In the left part of the element settings window you can notice a table with all sorts of query parameters that are inherited from a resource and method. On the Raw tab there is a submission of a request in accordance with the HTTP protocol. You can behold server response in the different formats in the right part of this element window. SoapU parses server responses and provides them in more convenient to perceive format than if it is in a raw HTTP.
Separately I would like to emphasize that resource and methods are part of the API Web service scheme description while queries are abstraction of the SoapUI itself, and it is not mentioned in WADL scheme. You can verify it returning to the WADL Content tab.
Sending HTTP requests
To make a request you should push the button as an Play icon in the upper left corner of the request box or you can avail of Alt+Enter shortcut.
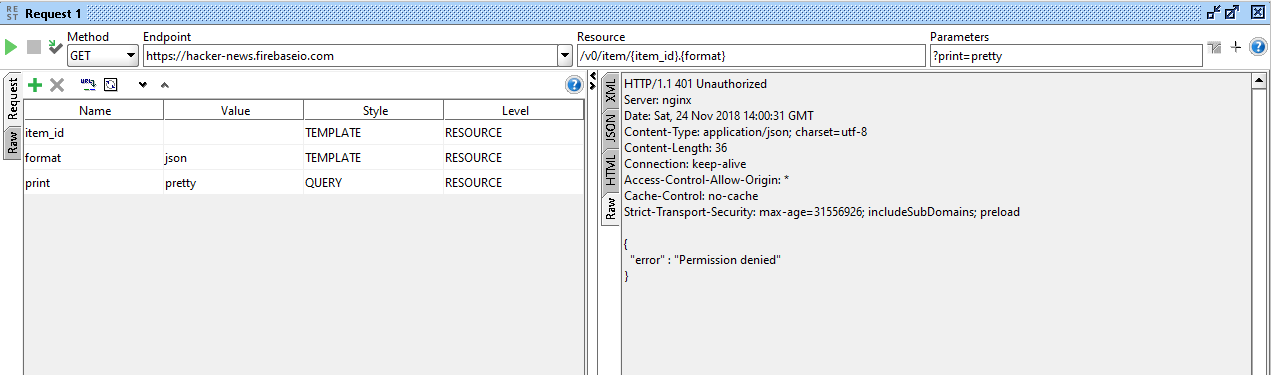
Server has returned a response status with error. What is it, then? Let’s consider the Raw HTTP request:
GET https://hacker-news.firebaseio.com/v0/item/.json?print=pretty HTTP/1.1

Accept-Encoding: gzip,deflate

Host: hacker-news.firebaseio.com

Connection: Keep-Alive

User-Agent: Apache-HttpClient/4.1.1 (java 1.5)
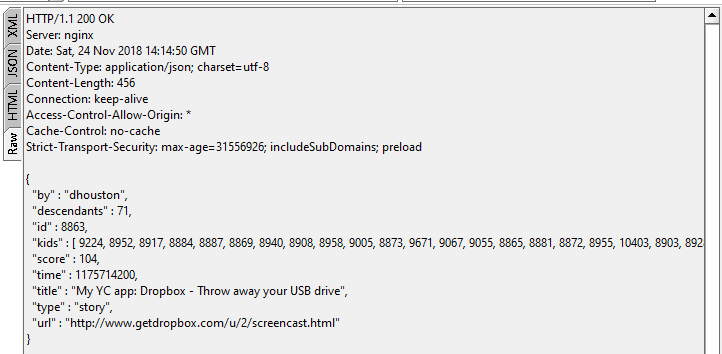
Great! Your first successful request in SoapUI has just been made. Please pay attention that depending on Content-Type in the response the program provides relevant submissions for a human readable perception of information. In this case you can find response body with its marked format on the JSON tab.
Writing test cases
We have learned to make query to a Web service so now it is time to cover it by tests. We can generate test cases for each of our resources by selecting Generate Test Suite through the context menu of the WADL element in the navigator. However, I’d rather make it step by step on my own.
So we add a Test Suite object in our project through the context menu or using Ctrl + T shortcut. Then we should name it Item Resource TestSuite. In the TestSuite settings menu we are able to detect a list of TestCases, controls for launching and pause of tests of this group, choose serial or parallel way of launching, set description on the Description tab, set variables that are common for all tests of the group on the Properties tab, write a script in Groovy that will be completed before running and at the end of all tests for test environment setting.
Criteria for cases integration in TestSuite can be various. This can be tests aimed at a particular part of service functionality coverage, tests aimed at Quick regression testing, tests for different parts of service functionality monitoring, and other. In our case that is not an issue that’s why I will add in prepared Suite only tests connected with an access to item resource.
Let’s create a first test case through the TestSuite context menu or using Ctrl + N shortcut. Then we should give a meaningful name expressing the coverage of the test for short, Should return requested item. Because of the test case name it is clear that we would like to make sure the object request service with the given ID should return relevant resource data. There are elements for starting and force trip of a case, case circularity option, service authorization method setting, choosing endpoint on which this case will be running, button for adding load and vulnerability tests in the TestCase edit window. Next is progress bar of a test case implementation and a list of its steps.
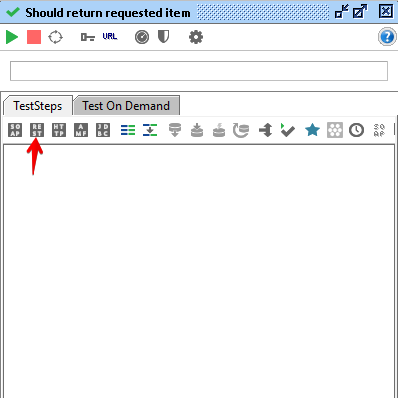
Test case can consist of many different steps, and one article is not enough to consider their diversity. That’s why I will concentrate only on one that is handy for us. Press the second button on the left with adding a step “Create a new REST Request TestStep”.
Then we should name it as a “send request” and in the appeared dialog box with the list we choose one of the previously created requests.

Now our test case has the first and only step. Further, we need to add “face-to-face” checks of the request results. At the bottom of the TestStep settings window (by the way, this window is very similar to the request settings window) you can find Assertions tab. This is where all conditions for this step check are added. Let’s bring in an assertion to verify that a returned response complies with a requested item:
- Click on a button with the “+” icon;
- Choose JSONPath Match snippet in the appeared window in the Property Content section;
- Write a path to the ID field in a response: $.id in JSONPath Expression;
- Write the value 8863 in the Expected result field.
Then we should run the step as we run request. This step icon in the navigator tree has become Green as well as Assertions tab. Great, this is success!
Frankly speaking, our test is of very low value and it is quite easy to break it. Let’s make a duplicate of the TestCase using F9 hotkey or through the context menu and change the item_id value to 9224 in this step.
Having run this step, it will become red in your test. Logically, the server has already returned the object with other ID. Now we have to amend the assertion description. We will specify a current step variables – ${item_id} as an expected result. Then, whatever item_id for the request we input our tests are always green. In SoapUI it is possible to indicate a link to any property value of any project element as value.
Running some tests
Let’s come back to our TestCase object. We have two steps in a list. TestCase instance implies step by step implementation. If any step has not completed its tests other steps will not be launched. Another situation happens with TestSuite. Here TestCases can be launched both in series or on parallel. If one of them has been failed other cases will be started or will not be interrupted. anyway. Let’s run our TestCase.
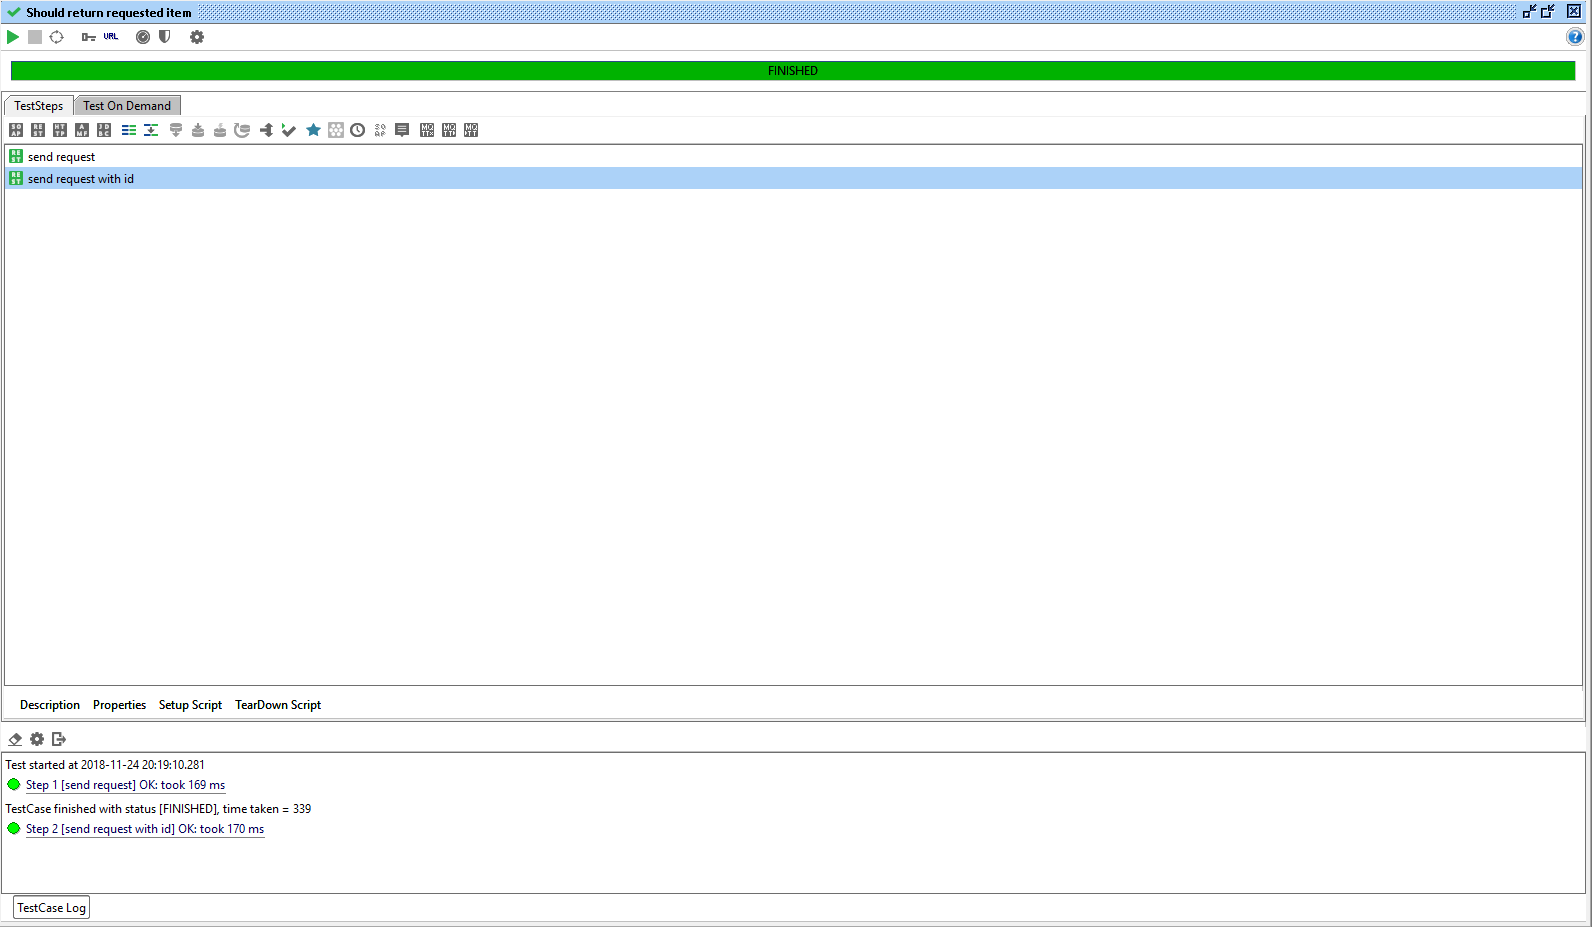
Everything is green. On the TestCase Log tab you can see the launched steps sequence and how much time their execution with verifications has taken.
Conclusion
In this article we have got familiar with SoapUI, the tool for writing automated tests of Web services, and with its basic functionality, learned to create an API Web service scheme, figured out what is WADL comprised of. Moreover, we have created our first request to an open API and covered it with the simplest tests without writing a single line of code. In SoapUI there is an opportunity to make a query even easier just create TestCase with HTTP Request step. However, in this article I have decided to show how SoapUI differs from tools with similar functionality. I would like to say in the end that there are many more ways of making queries, cases and tests than I have been able to cover. SoapUI undoubtedly helps to improve the quality of a developing product, helps QA engineers as well as developers reducing the number of routine work. The project structure encourages good systematization of test cases and allows to run verifications of a large and complex system functionality parts.
Materials
File of the SoapUI project committed within this article: https://drive.google.com/file/d/1DwQpxAy9RTJ1qxxs5VjDzUu_j54xSBfQ/view?usp=sharing