Authorization is one of the most important features every decent REST client should have. Postman is not an exception. It is equipped with various authorization methods from simple Basic Auth to special AWS signature and NTLM Authentication. In this article we’ll review some of the most popular authorization methods. This wonderful service https://postman-echo.com and its Authentication Methods section in particular will help us with testing.
Basic Auth
Let’s start with the simplest (and less common) method. It is quite rarely used (I used it a couple of times to restrict access to staging environment), definitely has some security issues, and shouldn’t ever be used without https. The thing is that for authorization (here we consider the option when we send the authorization data in a request header) we send username:password strings to the Authorization header base64. That means for a Postman user with a password ‘Password’ the string is postman:password and its base64 version is cG9zdG1hbjpwYXNzd29yZA==. Our data header will look like this:
Authorization: Basic cG9zdG1hbjpwYXNzd29yZA==Note that base64 is not an encryption or hash algorithm. It is a data encoding algorithm, and that explains its low security level. Now let’s see how Postman works with basic auth using an example from postman-echo.
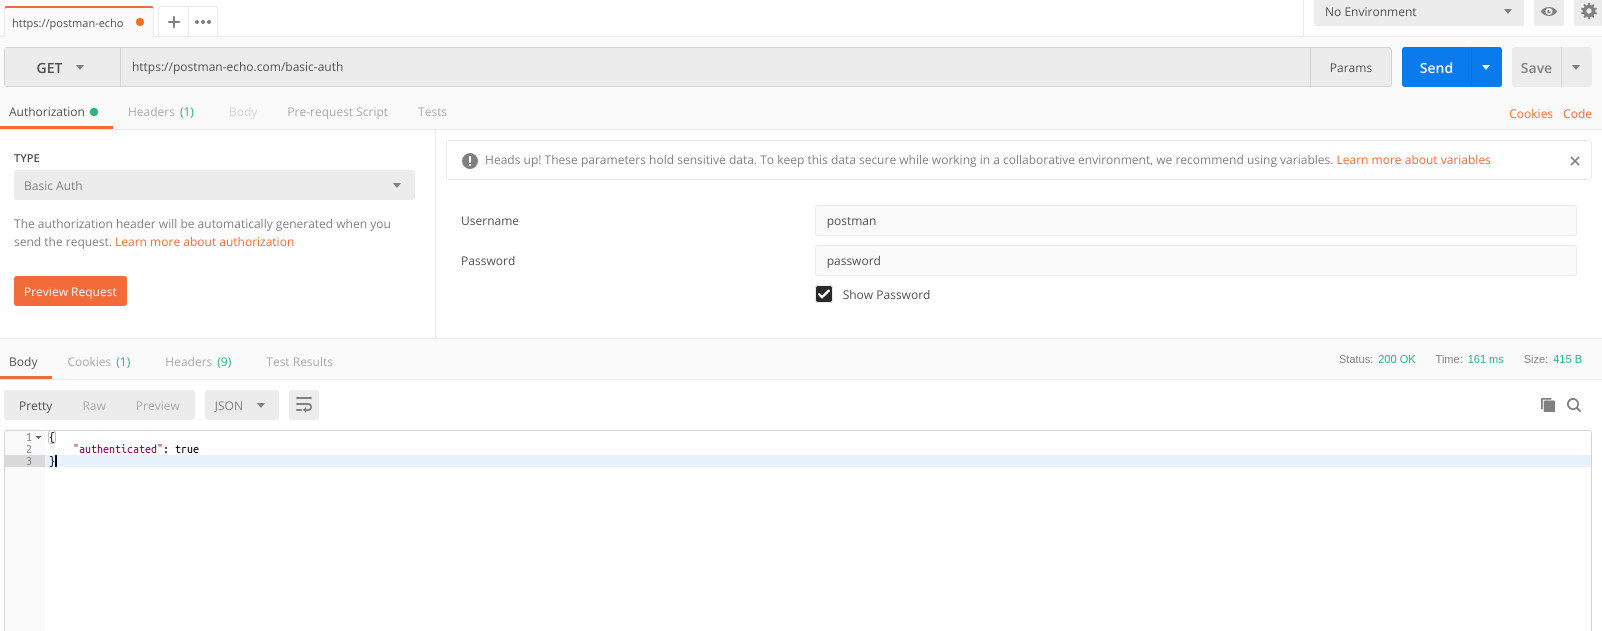
While choosing Basic Auth from authorization list you are prompted to enter your username and password. Just enter ‘postman’ and ‘password’, and the request willl be successfully sent 🙂 Postman encodes data to base64 and inserts it in the appropriate header:
Bearer token
Let’s now talk about bearer token. This is one of the simplest authorization methods. To send an authorized request, we need to pass the value Bearer <token>, where <token> is some character sequence (usually a hash) that is generated in response to a successful authorization. It looks like that:
Authorization: Bearer 129dabaf157205b46e393ce3e7f34ac6Bearer token was developed as a part of OAuth 2.0 in RFC 6750, but it generally functions as an independent authorization method.
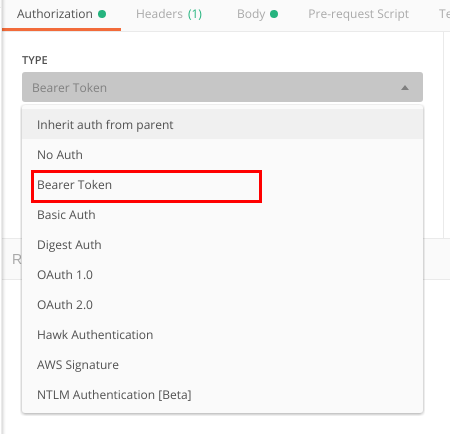
Now I’ll show you how to use bearer token in Postman. First, you find it in the authorization methods list:
Then you’ll be asked to type the token that I’ve mentioned earlier.

As you can see, Postman recommends you use variables to keep tokens secure. In some cases this also might come in handy – with the help of variables you can easily use the same token in different requests.
Digest Access Authentication
The first version of digest access authentication was described in RFC 2069. That is a standard version of this authorization method, which often doesn’t provide the required security level. Later on RFC 2069 was replaced with RFC 2617, where a range of measures for security enhancement were introduced. Postman supports this standard. Let’s explore it with an example from postman-echo.com.
Client-server interaction with digest access authentication includes:
1) Sending a request to the node that requires authorization. We get 401 (Unauthorized) code in response with digest access authentication parameters (or directives, according to the standard) in the WWW-Authenticate header. Here is an example:
WWW-Authenticate: Digest realm="Users",

                         nonce="Cmv5um4yl1wUrakLZhEH5FQpGA78EkkQ",

                         qop="auth"
2) Entering a login (username) and password (password) by the client (postman and password in our case). Here we just let the digest magic happen 🙂 No need to go into details since it’s all been thoroughly described in the standard. In short, the main thing here is calculation of the response directive using the chosen algorithm (MD5 or MD5-sess), the data that the client has, and the data that the server returned after step 1.
In the request all authorization parameters are passed in the Authorization header. The header will look like this:
Authorization: Digest username="postman",

                      realm="Users",

                      nonce="ni1LiL0O37PRRhofWdCLmwFsnEtH1lew",

                      uri="/digest-auth",

                      response="254679099562cf07df9b6f5d8d15db44",

                      opaque=""
It’s time to put theory into practice. Set the following request parameters in Postman:
- Request Type: GET
- Authorization Method: Digest Auth
- Username: postman
- Password: password
Realm and Nonce values come from the server, so we use variables mechanism and pass echo_digest_realm and echo_digest_nonce values to these directives respectively. That’s how our configured request looks like:
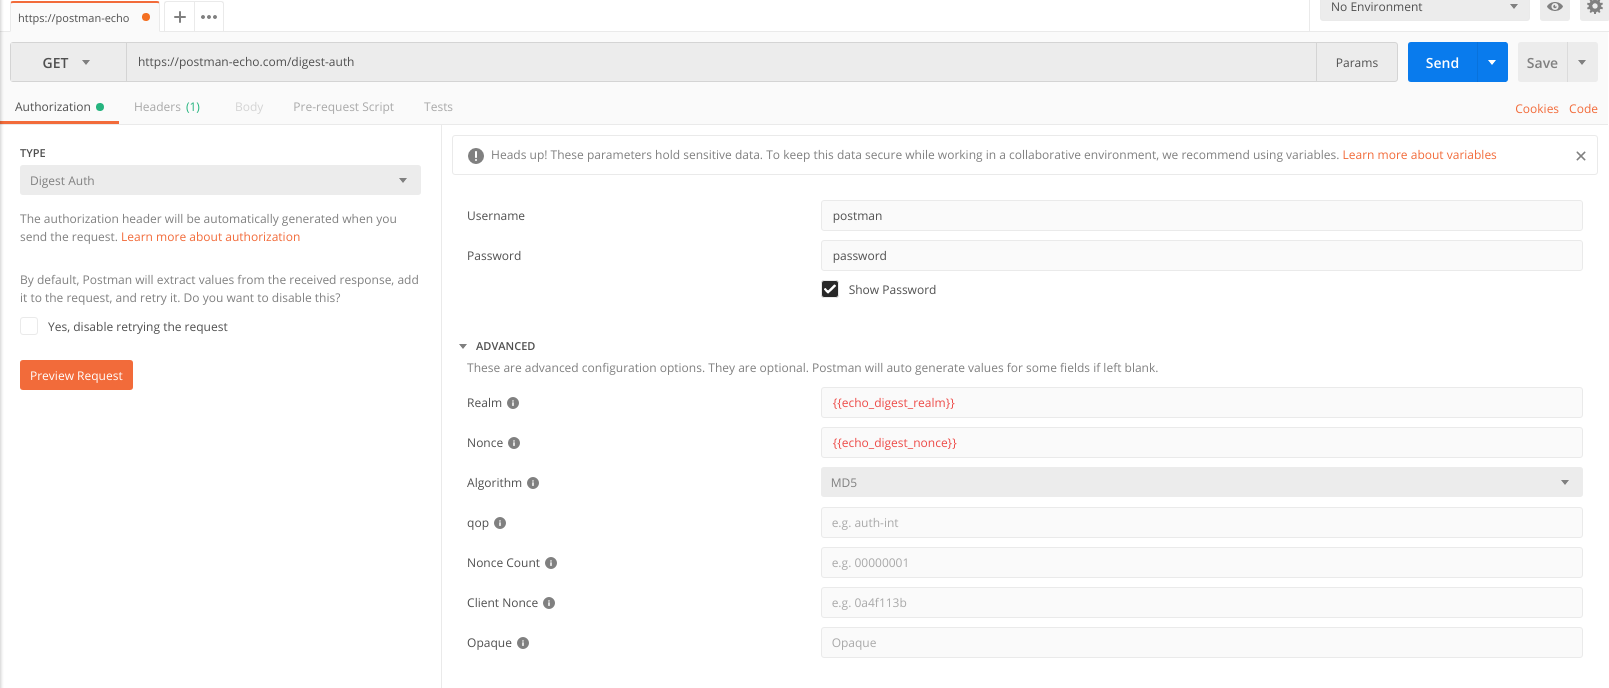
Now try to send the request and enjoy code 200 🙂
OAuth 1.0
OAuth 1.0 is an authorization protocol to access a third-party API. You probably use this authorization method from time to time while logging into some websites with Facebook or Github.
There are 3 parties in this authorization method:
- Server. In fact, that is your application itself
- User. A user of your app
- Service Provider. A third-party service, which user data we’re trying to get access to (with user’s consent for sure)
Let’s imagine we want to retrieve the user’s social network contacts. Simply put, to do it we should follow the steps:
- Send a request to the Service Provider to get a Request token. In the request we pass oauth_consumer_key (a key that identifies our server), oauth_timestamp (a timestamp), oauth_callback (an address where a successfully authorized User should be redirected to), oauth_signature_method (a digital signature type, that can take values HMAC-SHA1, HMAC-SHA256, and PLAINTEXT), and oauth_signature (a digital signature). Check out the standard to learn more about signature process. Please note that apart from request data, the Consumer Secret is also used – a key that only the Server and the Service Provider have access to. The Service Provider returns oauth_token (the very Request Token) and oauth_token_secret in response.
- Redirect a User to the Service Provider authorization page. Here the User signs in and authorizes the Server to access protected resources. Then the Service Provider redirects the User to the address written in oauth_callback (step 1) with oauth_token and oauth_verifier parameters.
- Using previously received oauth_token, the Server requests an access token. This is quite similar to the process of obtaining the request token, but for signature generating we use oauth_token and oauth_verifier from the previous step and ignore the oauth_callback parameter. The Service Provider returns oauth_token (our Access Token) and oauth_token_secret in response.
- Send a request to get our User’s contact list, using the Access Token.
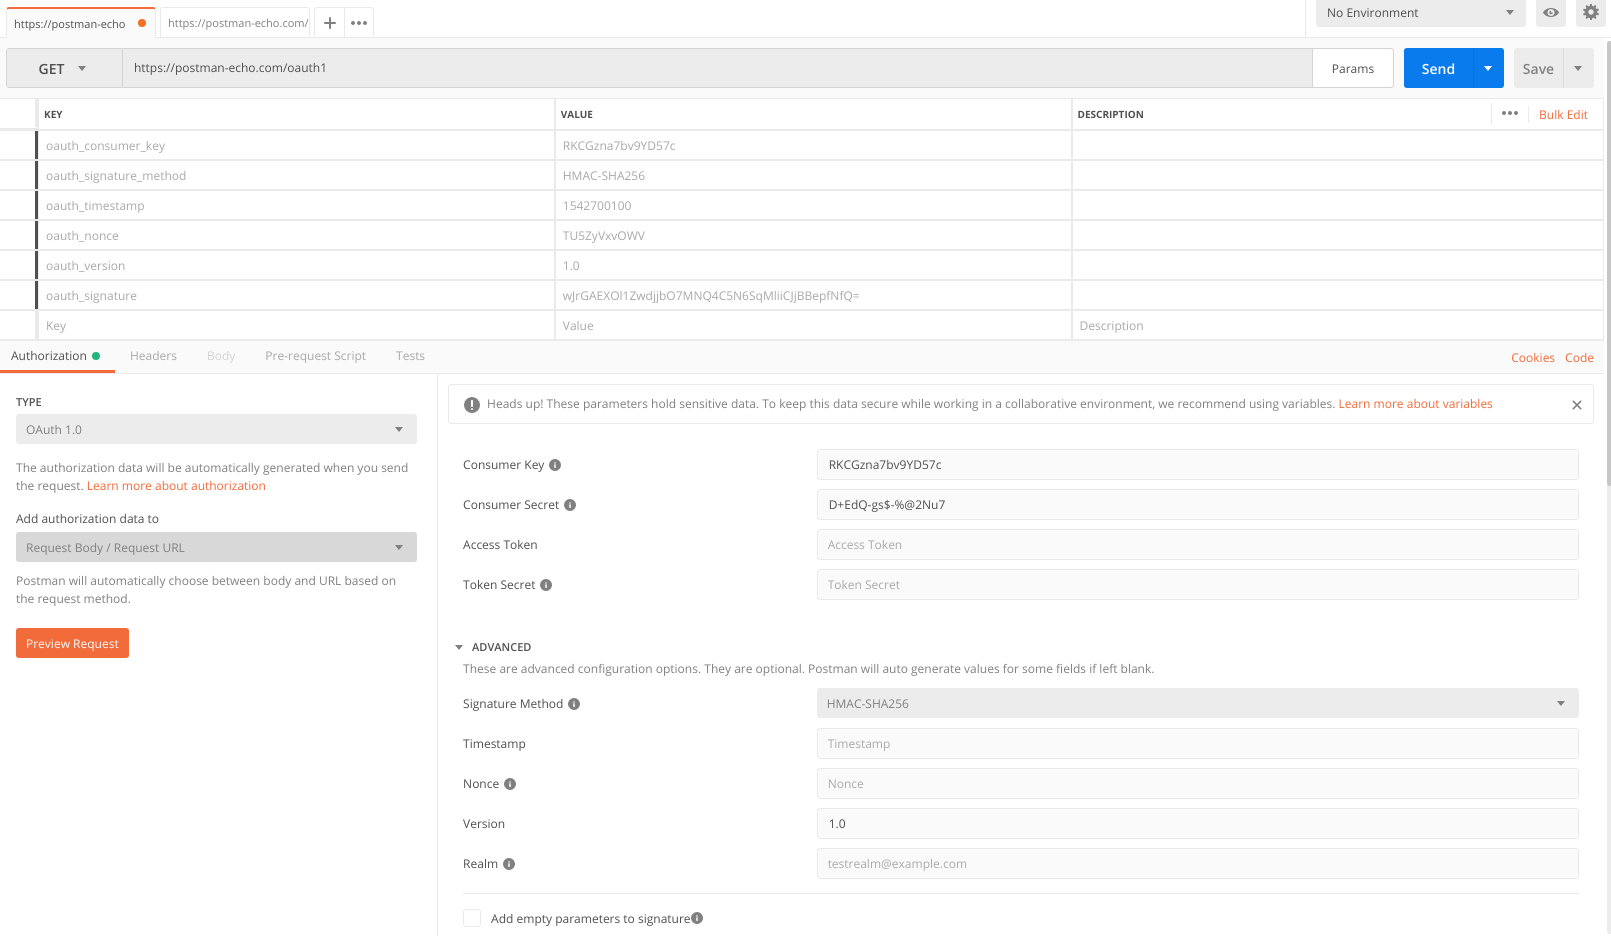
Let’s see how this authorization method works in Postman. Postman has the necessary field set, it can pass the authorization data both in query parameters and in the authorization header, and also calculates a digital signature automatically depending on the chosen signature generation method.
Let’s use our favorite postman-echo for testing. This resource provides the endpoint for signature verification (as you see, this is an essential part of this authorization method).
Create a new GET request on https://postman-echo.com/oauth1 and select OAuth 1.0 as an authorization method. Put RKCGzna7bv9YD57c and D+EdQ-gs$-%@2Nu7 values in the Consumer key and Consumer Secret fields respectively. As one can notice, the “Add authorization to” field allows you to choose where to add the authorization data. This is how the request looks like if we send the data using query parameters:
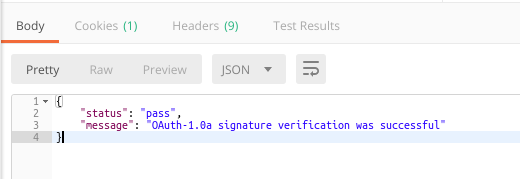
If you do it right, the Service Provider will report that the signature verification was successful.
If you already have an access token, you can type it in the corresponding authorization parameters field and send your requests to the authorized part of your application.
Conclusion
In this article we’ve discussed several authorization methods. In terms of authorization, Postman is much more powerful though. OAuth 2.0, Hawk and some more specific authorization methods are left aside today. Well, that’s a nice reason to get back to this topic one day, isn’t it? 🙂